Choosing to ignore the many arguments about whether Samuel Beckett's 'Fail Better' quote is less motivational and more despairing when actually read in it's original context I'm here today to blog about why I find #sewingfails a useful (if still a dispiriting) experience. And why I think making a toile or muslin is a must in dressmaking, especially when trying a new pattern for the first time!
This started with an experiment (SCIENCE!) - In the Year That Shall Not Be Named I had planned to get back into sewing more than I have in recent years. I started the year with a brand new sewing machine (my trusty vintage New Home having finally died a death), a plan to take a class a month on something craft or sewing related and a vague internal promise to actually use up some of my ridiculous sewing fabric stash. I...failed. Classes were cancelled after I only managed the first 3 (Jan-Mar), WFH did not bring bags of time & energy for sewing and from Monday to Friday my sewing room became my home office. I suppose I could have taken my screen set up down every night, but I did not.
Anyhoo, last year did NOT make any sort of dent in the stash, though I did make quite a few masks and I at least finished the Anorak Of Quilted Doom that had been stuck as a UFO for a few years.
While I may not have achieved much on the sewing front last year in comparison to my heady planning, I did at least review my list of possible projects. One of which was a pattern I saw in Threads Magazine a few years ago for a 'pattern free' pair of trousers made out of rectangles that are sewn on the grain but end up as a bias cut garment. Intriguing.
I also have been looking at low or zero waste sewing patterns and design recently - partly because I got a copy of Liz Haywood's book on
Zero Waste Sewing for Christmas, partly because not adding to the huge problem of
textile waste is something I can do for the planet (and something I have not been great at in the past). Zero and low waste sewing is a separate post in itself, but these bias tube trousers are fairly economical on fabric given they are based on nice straight rectangles, so qualify as low waste.
You can see the start of the article
here (the full article is behind the Threads Insider paywall). I'm not actually an Insider (too cheap) but I have been a subscriber to the magazine for years and I knew I had the article somewhere. To the online magazine Index!
Fail. I could not find a reference to the article.
Back to the online magazine Index when I remembered that Americans call trousers pants! (Seriously, you'd think I'd be good at search terms and stuff, doh).
 |
| Alarming Algebra |
Once I'd found the reference [Threads Magazine, 166, May 2013, p.50] and could dig out the article in my magazine library I did a thorough read through. Got confused. Got alarmed at the need for actual algebra (square roots were involved). Remained intrigued by the concept.
So, I did what my gran taught me when I'm confused by a pattern. I decided to try it out. Making a
muslin or toile to check your fit before you make a garment can seem just so very, very booooring. I get it. I, too, used to get enthused by a new pattern and just dive in to my lovely fabric and then...be bitterly disappointed when it didn't turn out the way I wanted. Or end up screaming at the pattern instructions and ripping out stitches when it just did NOT make any sense. Both options lead to wasted time and fabric and don't really help with textile waste... and sometimes lead to abandoning dressmaking altogether for years.
Interestingly, when my gran taught my mum to sew she did not bother with making muslins. Or with basting, or hand finishing hems or quite a lot of the stuff she took time to teach me. We figure the reason for this is that, back when she was teaching my teenage mum to sew, my gran was a busy working mother of three - running the family hotel business and her dressmaking side hustle, while maintaining an active social life - and by the time she was teaching me more complex sewing techniques she was retired and had more time to play (and learn - she had a library of dressmaking manuals and books and used to refer to them a lot. She was always trying new techniques). Anyway, she was quite firm with me on the need to make a muslin for any pattern you were trying for the first time. It helps you check the fit, make any alterations you need to the pattern and try out any weird or complicated bits of the garment construction before you cut into your precious, precious chosen fabric. It also helps you work out if that style really does suit you. Sometimes that finished dress you see yourself wearing with sophisticated nonchalance in your head makes you look more Coco the Clown than Coco Chanel in real life (I am not made for ruffles and chest flounces and the pussy bow blouse is never going to make me look like a glamorous film star no matter how many times I think it might).

|
| That...just did not compute |
Because the method for making the trousers was so unusual and difficult to get my head round (you take two rectangles cut on the straight grain, fold each in half lengthways, sew up the short ends, then...sort of fold the top down into a triangle to find the point at which you join both long edges together in a weird twisty tube, then cut holes in each end to open a twisted bag into a tube that hangs on the bias and...you get me, complicated). I tried it out once in paper just to get my head round the origami angle. I did this at 1/100th scale to see if my algebra seemed reasonable or way out. I also tried out a tiny cloth tube very quickly with basting thread.
 |
| Tiny test tubes... |
By this time I was pretty sure I'd figured out the mechanics so I planned to go to a full scale test garment. One of my gran's top tips was to make a test muslin out of a cheap, but wearable, fabric. That way if things all worked out you had two new garments - one for everyday wear and one in the fancy fabric you spent a lot of money on. I often make my muslins out of undyed calico and draw all over them, but this time I figured 'Why not?' and went to the stash. I have a semi-resolution this year to try to sew from my stash (which is 40 odd years of huge plus the stash I inherited from my gran. So ridiculous in all ways and well past SABLE*) so I had a look at the log** and picked on some cheap teal plain/patterned 100% polyester that I ended up with as part of a BOGOF offer on unstitched suit sets at a fabric shop in Bradford. I liked the colour so grabbed it at the till, but I'm not a fan of the static cling 100% polyester brings so it hadn't been touched. It also wouldn't break my heart if it all went horribly wrong, but still had the right sort of drape for wearing on the bias.
1st problem - unstitched precut lengths for shalwar kameez tend to be quite narrow fabric, usually about a metre wide, and though you get two toning fabrics you only get a couple of metres of each. My maths (and a bit of forum reading) led me to believe I was best with a rectangle c.70x180cm. Not enough fabric to make matching legs out of one fabric. So
piecing was necessary but I wasn't sure how that would work on the twisty bias tubes...
2nd problem - no pockets! What's the point of trousers with no pockets??
So, I made some teeny test trousers, a mini-muslin for my muslin.
 |
| Teeny trousers of testing |
This allowed me to quickly see what happens when you mix a plain and patterned fabric in these trousers (verdict - I quite like the effect, but the pattern section needs to be at the bottom of the leg) and also to try out a way of adding an in-seam angled front pocket. I also figured that U-shape you cut out for the crotch of the trousers could give you fabric for some patch pockets on the back, taking the pattern from low waste to (potentially) no waste. Win!
If a pattern is simple, or you are drafting it from scratch, or you want to try out something like
draping or
freehand cutting, making a small scale sample can help you refine your ideas and try things out quickly. I have enough small scraps of fabric hanging about that it's usually easy to do a scale test in a way that doesn't waste fabric. 1/4 scale is good, but I did this at 1/10th scale. A bit fiddly but it was all rectangles. I don't have dolls or children and my nieces & nephews were never really doll kids either, so I usually keep the scale models with the pattern itself as a fabric reference document.
The thread of actually making up my full size muslin is on Twitter
here, from grain straightening woes through fatal #sewingfail rookie error to final (unsatisfactory) garment.
So my hopes for a wearable muslin ended in failure. But what did I learn?
Most of my dressmaking adventures when I started out ended in failure. Poor fabric choices, poor pattern choices, poor fit. Through those failures I learned how different fabrics work with different styles, that chiffon is a bugger to sew and a total pain to unpick, that I should think twice before wearing chiffon anyway (I'm not really a floaty summer meadow sort). I also learned the value of trying things out, of taking the time to make a muslin or test garment to get things right. Of figuring out how sewing stuff works so I can make tweaks and alterations to things (*cough* adding pockets *cough*) to end up with a garment I'll actually wear.
40 something years on I still fail. And apparently I still make stupid rookie errors like swapping left for right and front for back when I'm not concentrating.
With this failure I learned:
1) I like this pattern. I like the construction challenge and I like the drape of the bias legs. I even quite like that cheap fabric when it's made up into something.
2) My pockets work! I just really need to pay attention when I'm positioning the crotch cut out and remember which is the front and which is the back (or side).
3) I may have paid too much attention to some
warnings about sizing in various pattern review forums and
blogs. I erred on the side of caution and rounded up when I probably should've rounded down and ended up with a pair of trousers that weren't just wide in the leg but were actually too voluminous. I need to redo the maths, scale down the size and....try another muslin!
4) Mainly because I also learned that, due to the construction method, you can't really try them on while making them and it's damn hard to make major fit alterations to these trousers once you've sewn them up. Due to the bias drape and that long twisted main seam that runs down the leg, combined with the fact you cut the original rectangles when you open the tubes and put in the crotch, you can't really take them in to lose volume. You could mess about with adding pleats but then you start losing that bias drape effect and that's the point of the whole trouser.
5) I'm probably not going to keep that test muslin as a garment, even though (or actually because) I like the fabric in the end. It's too big, even for flooping round the house and the pocket mistake
really bugs me. So stupid. So, I'll cut it back down, re-use the elastic somewhere else and end up with some salvageable rectangles of on-grain fabric I can piece together to make something else. Maybe a
top with a bow....
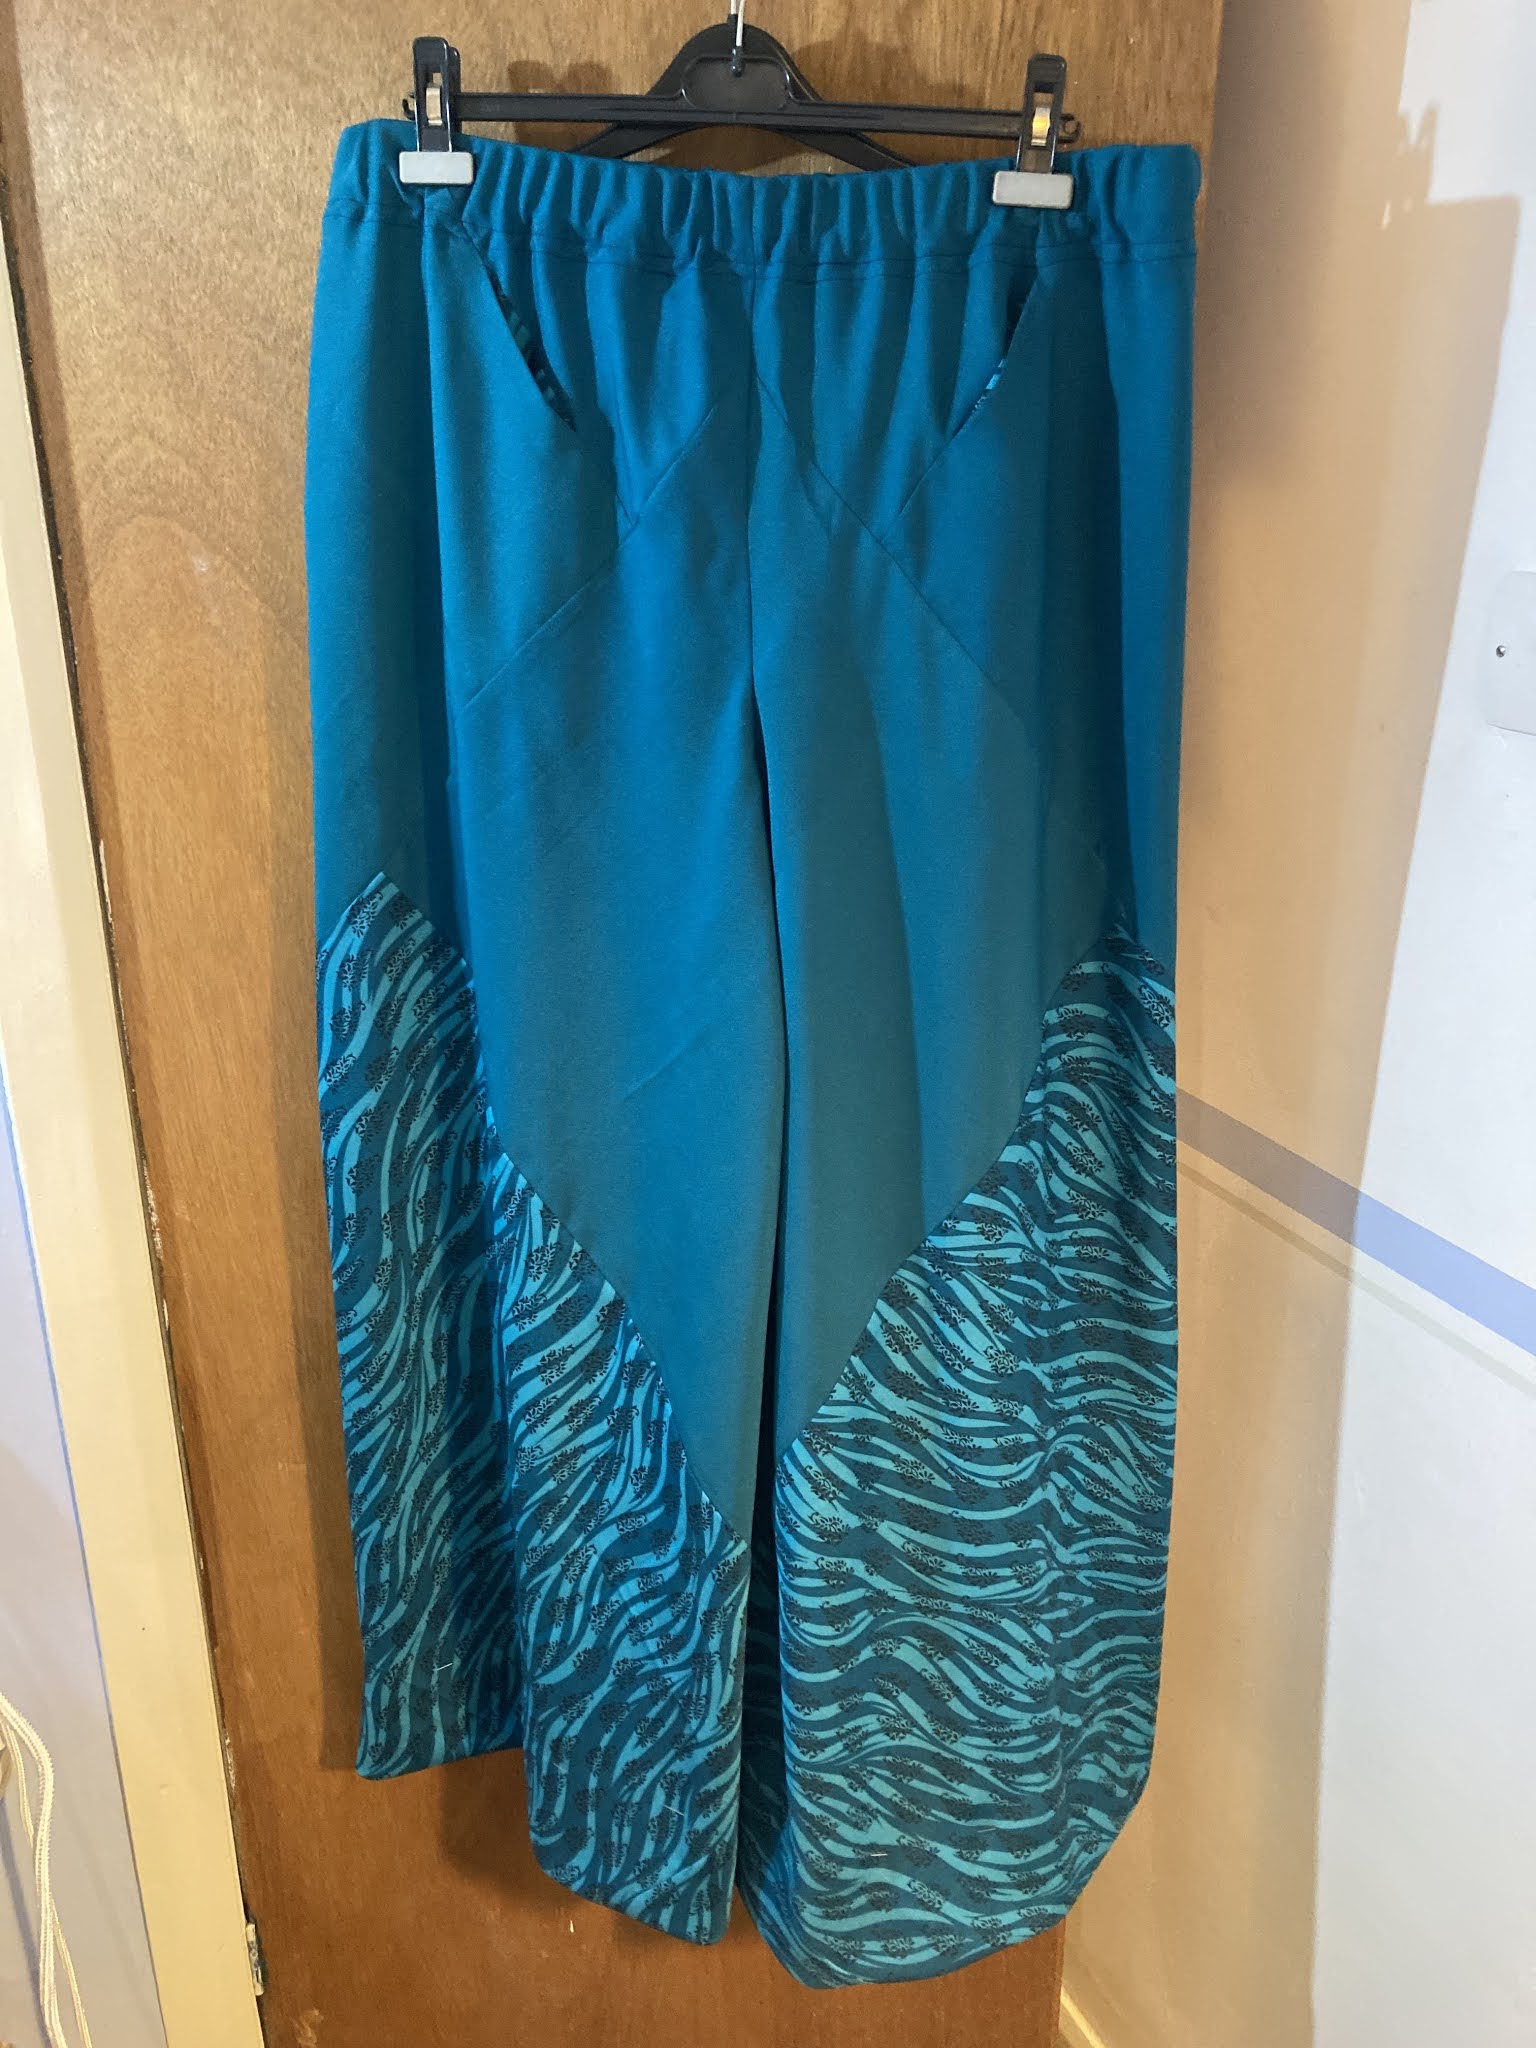
 |
| Much Too Big and the left leg should be the right leg, but a useful failure. |
*Stash Acquisition Beyond Life Expectancy.
**Yes. I catalogue my stash. I refuse to feel nerdy about that. I mean, just the fabric. The haberdashery I just store by type. I'm not a monster.


As a guest blogger I should also have signed this post. Oops. It’s @stefarchivist writing btw.
ReplyDelete*Another* approach to a zero waste trouser pattern is almost the opposite. It hangs on the grain but has a super long bias cut twisty seam. Again, interesting construction but harder to sew (bias cut edges can stretch like anything), even though you can try them on. Holly McQuillan’s spiral trousers are like this and Luz Haywood blogs about making them up here:
ReplyDeletehttps://lizhaywood.com.au/making-holly-mcquillans-zero-waste-spiral-trousers/
people who catalogue their haberdashery are not monsters fyi :D
ReplyDeleteOh boy what a complicated pattern, but fascinating construction
ReplyDelete