Simple Drawstring Bag

Earlier today I made this little bag from a rectangle of scrap fabric. It's a very basic method - there are all sorts of ways this could be improved such as adding lining, a base or French seams. However, for a quick, easy make it works just fine!


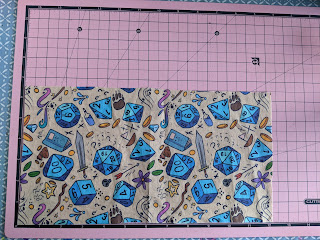
I wanted to make a little bag for a nerdy friend - what better than this awesome dice/RPG/DnD themed fabric (from Spoonflower). I only had this rectangle left over from other projects.


Step 1: give it a good iron!


Step 2: fold in the ends, iron them down and pin. I folded them by 1/2 an inch. This fold will form the channel where the drawstring of the bag will go.


Step 3: sew down the folds making sure to sew close to the raw edge of the fold so you have enough space to feed the ribbon through later. Now fold the fabric in half with right sides together. The edges you've already sewn should meet together at the top. Pin then sew up the open sides - make sure to stop at the fold or you'll sew up the channel for the ribbon!


Step 4: turn the bag the right way round. I found that the folded edges weren't neat enough and overlapped a bit, which would make it hard to pull the ribbon through, so I carefully snipped them.

Edges in need of snipping

Step 5: feed the ribbon or cord through the channel on one side, then back along the opposite side. I have a device to assist with this but the safety pin on one end of the ribbon technique is another tried and tested method of achieving this.


Step 6: tie a knot in the end of the ribbon to secure. You can also add beads or a toggle.


(At this point in the process my cat Cecilia sat on the project so obvs I have included that for your amusement)


Et voilĂ ! One easy little drawstring bag!


Do you have a go-to bag pattern or method? Let us know!

Comments

Popular posts from this blog

Eco-friendly Upcycled Face Wipes

 I recently ran up some eco-friendly face wipes for a friend. These are designed to replace cotton pads or face wipes, and are washable. To increase their green credentials I made the pad section from an old towel. I had some charm squares spare, so used those as the backing fabric. I cut the towel into squares that were slightly smaller than the charm square, and wrapped the fabric over the towel piece to form a small border.  I then sewed the top fabric down with a zigzag stitch. This meant I was mainly sewing on the fabric, as my machine can't sew through towel (unless I haven't found the right setting or needle of course)! Very very simple, but pretty and functional! There are lots of tutorials for other ways to make these face wipes, such as:  https://www.arosetintedworld.co.uk/how-to-make-reusable-make-up-remover-pads/ It seems to be even more simple with an overlocker:  http://juliawithanh.com/sewing/23-reusable-face-pads You can even crochet some! https://dab...

5 Top Tips for New Sewers

 While I still consider myself a beginner sewer, I do feel that I have made some progress. It's now been about a year since I started sewing again, having not got far at all the first time I tried. I dusted off the sewing machine to make some face masks at first, and that really boosted my confidence to start making more and more. Recently I made a couple more face masks and was surprised at how much better I was at them and how much I understood about the reasoning behind the construction method and pattern. Proof of progress!  So even though I still feel very much like a beginner, and have a LOT still to learn and many skills to practice, I thought I would share the most useful things I have learned to date plus some resources that have helped me. 1. PINS . Seriously. Pin everything together. Then go back and add more pins. I used to shove a couple of pins in and then get cross that the fabric slipped or the lines were wonky. Pins (or clips) are your friends. Make your seam ...

#30DaysWild - crafting with nature

It's 30 Days Wild , the month of nature activities and wildlife activism organised by The Wildlife Trusts. During June, we are encouraged to do one 'random act of wildness' each day, whether that's something as complex as building hedgehog houses or digging ponds, to something as simple and peaceful as having breakfast outside or watching a wild webcam. The event gives us lots of opportunities for some wild crafting! Here's a rundown of wild crafty activities to do with kids - but there's many more on my 30 Days Wild Pinterest board - have a look! Leaf painting/rubbing Leaves can be used in so many different ways to create artworks - place them under paper and rub with crayons for an imprint, cover them in paint or felt-tips and press onto paper, arrange them in a collage, use them as the skirts for a woodland fairy, or imprint them into clay or salt dough! Sticks Sticks have so many potential uses! They can become paintbrushes, magic wands, picture frames, we...